I love to use Pinterest as my virtual bulletin board. As you might guess many of my pins are sewing related. Click here to see what fun stuff I've found and pinned to different sewing boards.
Showing posts with label bulk. Show all posts

Wednesday, August 28, 2013

Jeans Sewing: Skirting the Issue - WAISTing Time

I have been spending quite a lot of time with my jeans-style denim skirt waistband. And I'm definitely not WAISTing my time. it seems mighty important that I do so.

As you may recall from other postings in my "Jeans Sewing: Skirting the Issue" theme, I'm using this project to learn skills that will help me when I work on sewing my first pair of jeans. There's a lot to learn, and I don't expect I"ll get it all down before I start my actual jeans sewing project. But whatever I can take away with me, will stand me in good stead with that first pair.

Here are some issues I've worked on, not all of which I've resolved.

* Given the weight of the denim (11 oz - heavy weight) do I interface or not? I went ahead and did so.

* Two layers of this weight denim seems like too much. I lined one side of the waistband with a nice thin cotton print (check out the roses)

* Ugh! Two heavy denim seams at the waist and then you add in foldover bits from the edge of the waistband ... How many layers of denim is that? !!!!  I've been doing a lot of scissor trimming after seaming,  to attempt to cut back on additional bulk in this zone, but there's a limit as to how much I can cut away without just cutting off the whole waistband. This is something to ask around about.

* Getting the waistband to meet properly in front - waist seam to waist seam and the tops at the same height is no easy feat. Is it just me? I have been working on what sometimes seems like an endless loop... baste, try on, unpick, re-baste,  try on, unpick.... repeat steps until.... OK I thinnnnkkkk I've got it! It's worth working to get it right.

Next on the agenda is adding the rivets on the pockets, and the jeans button on the waistband. After all the fussing over getting the waistband to meet right, I sure hope I get the buttonhole centered properly over the button! 

After that the hem. I've already finished the raw edge on the bottom of the skirt and pinned it in place. I still need to try it on and eyeball it.

I've also got several long topstitching threads hanging around in a lot of places, waiting to run through a needle and take through to the back side. It's challenging figuring out at what points to topstitch the different parts, especially on the waistband. Some of it (like on the side seams) had to be done before other garment construction steps.

On the waistband, however, I topstitched too soon. Well, so... a little bit of my topstitching isn't totally continuous. I wouldn't be surprised if the same things happen with my test garment jeans, but once I repeat the process with them, moving onto a second and third pair, I'll start to learn when I can continuously topstitch without being likely to have to release some of the threads.

I was planning to work on cute back pockets and belt loops, like real jeans ones, but frankly I just want to finish this puppy up! I'm kidding myself that I could add those puppies later, but I bet I won't. I've got my Lilacs and Liberty shirt to finish, as well as several knit tops to create - hey the denim skirt cries out for those toppers. I'm also taking a pants drafting class at Cañada, where I'll be drafting my own jeans pattern. So I'll  have another opportunity to get on with those quintessential jeans additions in the not-too-distant future.


Working on my jeans-sewing skill set is almost like being a new sewer. You know what that does for me, right? Yep, it keeps me....
 Enchanted by Sewing!

Tuesday, February 19, 2013

Technicos: Ruffling those Scales

My beruffled sample
Looked nice, crisp and flat after a final seam allowance trim
I'm back from my unexpected family medical visit, though I will be making regular return trips for a bit. Good thing I put the Enchanted By Sewing podcast on hold until next month, so I can play catchup. During that visit I got behind in my samples for sewing class. It's tempting to hurry through the pile, but I found that careful work was a bit of a tonic after the stress of dealing with emotions and multi-tasking of the past week-plus.

I wasn't expecting the ruffles to be a big deal. Ruffling was the first sewing skill I ever learned. (I described my experiences in the 'cast as a little girl with a great big needle, a long thread and dolls that wanted dressing back in Episode 2: Romancing the Dress.) That's probably why I chose to get this sample done first, easiest first right?

The ruffles weren't a pain to sew, but I did focus on a few things I hadn't learned in my long unstudied sewing career. This ruffling experience reminded me of learning versus practicing piano scales. Every pianist learns to play her scales, she gets the idea of the relationship between one note and another just as I long ago learned the basic idea of sewing ruffles by pulling a thread. But it's aware practicing and  attention to details, that turns the pianists pressure on the keys into a thing of beauty.  I realized while working on this sample that it wasn't enough that I knew how to gather fabric on a thread. It's repeated practice with this basic skill, and attention to what makes them look crisp that improves my sewing performances.


While I was sewing, pressing and trimming, I found myself singing a little tune from one of my daughter's favorite Disney movies, the "Aristocrats"


Do mi do mi do so mi do
Every truly cultured music student knows
You must learn your scales and your arpeggios
Bring the music ringing from your chest
And not your nose
While you sing your scales and your arpeggios

If your faithful to your daily practicing
You will find you progress is encouraging
Do mi so mi do me so mi fa la so it goes
When you do your scales and your arpeggios

Do mi so do

The goal was to create two ruffles. The top one (shown on the far left) is a self-faced ruffle, pretty on both sides. The lower (rightmost ruffle) is a narrow-hemmed embellishment.

Narrow-Hemming Trick

In order to turn a very narrow hem I've learned to run a row of stitching along the hem before pressing it under, then under again and pressing. My narrow hems now come out a lot straighter.

The pen is pointing out the midway little clip spot I used to help me align the ruffle as evenly as possibly.

Getting those ruffles to fill more evenly

I laid the little clip in line with the midway point on my supposed garment (imagine the yellow material is an apron skirt that I'm going to embellish with a fuffle on the hem. Then I pressed the ruffles. This is a new-to-me trick. It sure helps get them in place so I don't get too much ruff in one spot and too little in another

Nearly there, But Kind of Thick Behind
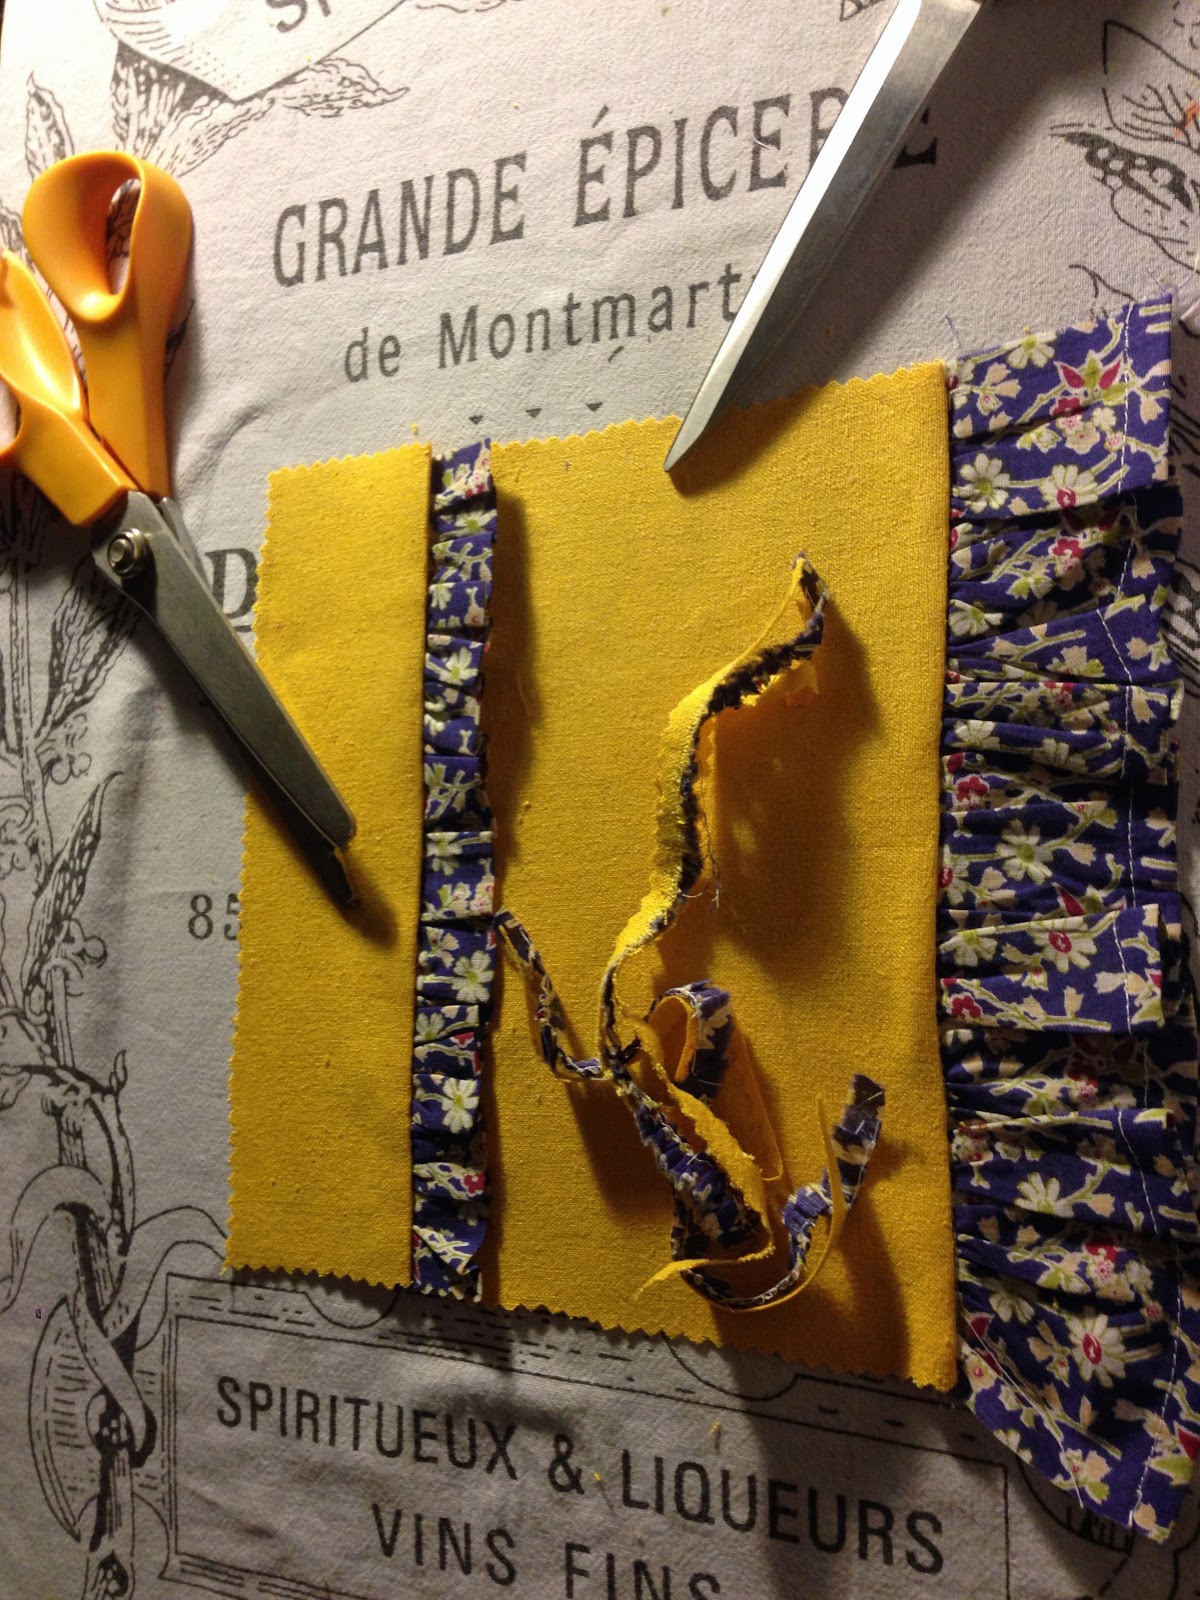
Removing Ruffle Bulk 
The ruffles are sewn down and pressed, but they look kind of thick, don't they? I flipped them over and trimmed the seam allowance for a nice improved flatter look.

Flatter and Crisper


Do mi do mi do so mi do

Every truly cultured sewing student knows
You must learn to trim and press your ruffles-Oo
Keep those folds from bulking up the seam
And on thy clothes
While you trim 
and press those lovely ruffles-Oo

If your faithful to your steady practicing
You will find you progress is encouraging
Do mi so mi do me so mi fa la so it goes
When
you trim and press those lovely ruffles-Oo

Do mi so doi