I love to use Pinterest as my virtual bulletin board. As you might guess many of my pins are sewing related. Click here to see what fun stuff I've found and pinned to different sewing boards.
Showing posts with label fitted. Show all posts

Sunday, January 4, 2015

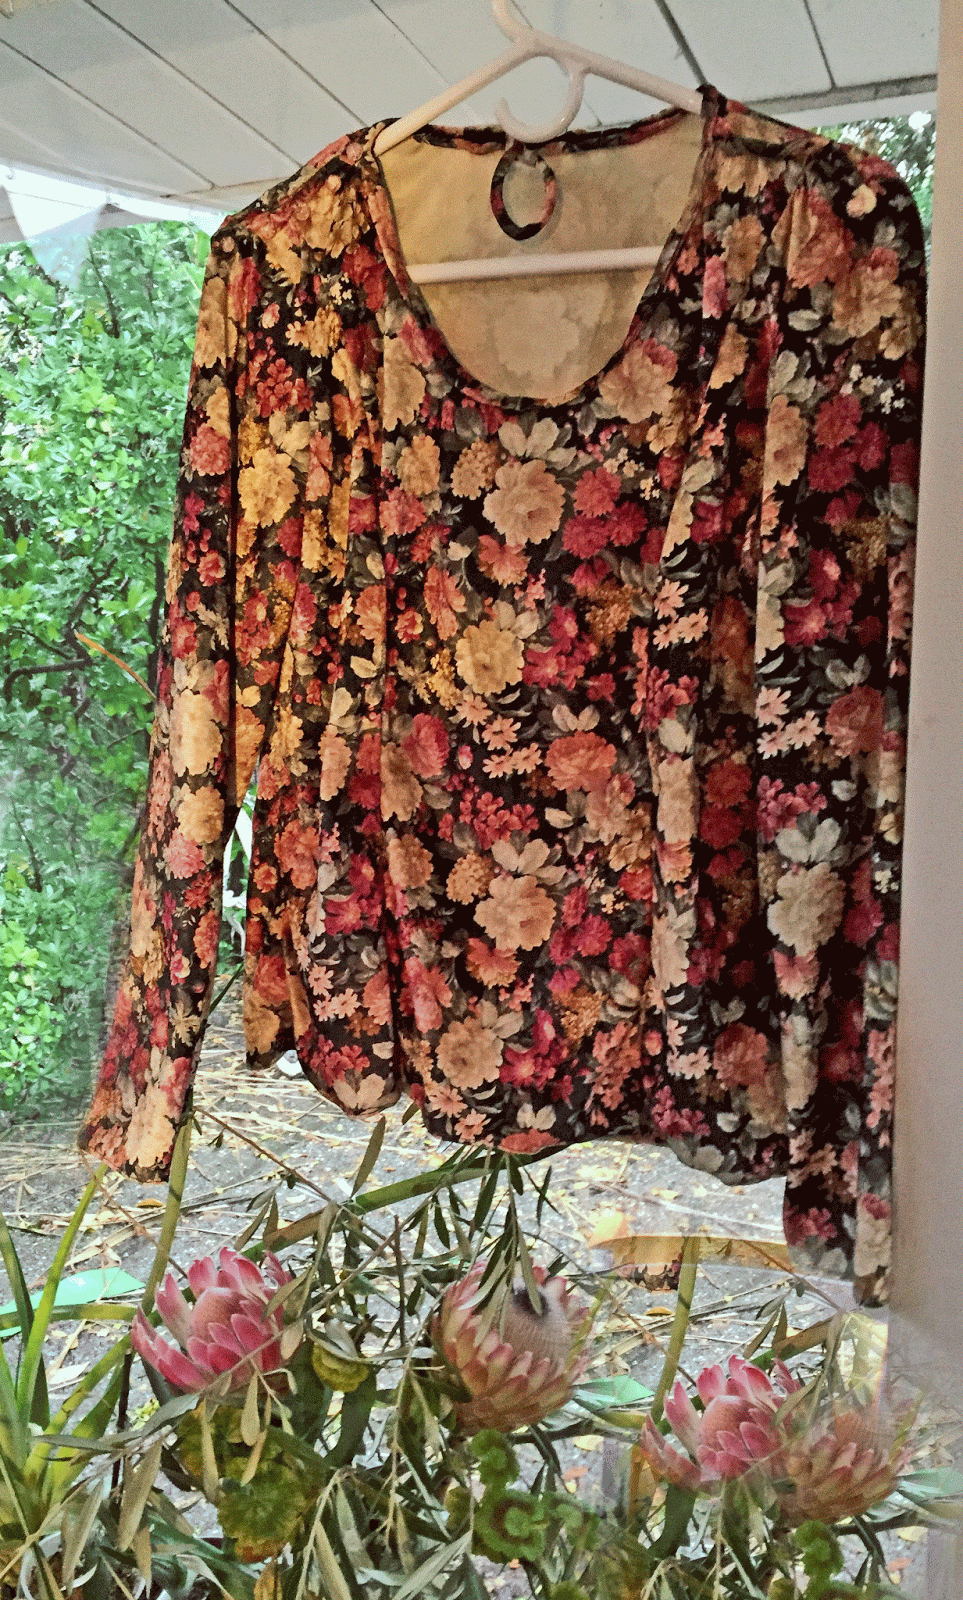
Panne Velour Princess Tee - Bit of a Pain (V8323)

Do you spell that Panne or Pain?
Working with Panne Velour Knit is a slippery business!
I was sure I'd have no problem zip-stitching up this crushed panne velour knit tee in time for having our neighbors over for New Years Eve supper. Har de har har! 

Do you like snakes because of the way they slither? Well if so, I recommend you run right out and buy a couple yards of crushed panne velour. Actually, I still recommend it. It's a beautiful fabric and it feels fantastic. I just encourage you to take a little extra time - OK a lot of extra time- when you plan your sewing schedule around this material. I also recommend choosing a pattern that requires minimal stitching.

This is my third experience with Katherine Tilton's form-fitting princess-seamed tee shirt, V8323. I've been quite happy with the red and floral velour versions I created recently. I've already worn both a number of times. Working with slippery panne velour is a bit of a surprise though. My Princess Laurel,  floral version of this tee was also a velour type fabric, but it didn't have the same moving-down-the-road, slithery characteristics as this crushed panne. The neck didn't cut right (because of the way the material moves), so I've cut a piece of thin tissue paper I plan to baste down -by hand - so that the neck will actually be round. The fabric just slipped and slid around and under my scissors and shaped things in unexpected ways, so getting a round neckline didn't happen. Once I baste down the round shape on the tissue, and eyeball it to make sure it is round and symmetrical on both sides, I'll cut right along the stitching line. Or else I'll leave that stitching line in place and sew the self-fabric bias strip right up against that basting line.

When I started out sewing the princess and side seams, I immediately found that funny things were happening. The back raw edge started disappearing beneath the front one. So I had to get busy with Auntie Seama Rippah. And you know how Auntie feels about knits, right? To date, I've got the princess seams and side seams hand-basted. And what did I learn then? I'm also going to need to sew it up tighter. Yup, it's the fluid nature of that panne velour.  I'm sure I'll be hand-basting the sleeves on as well.

It looks like it will be a pretty shirt that feels great on my skin. Perhaps you'll see me in it by next New Years Eve!

~ ~ ~ 
Web Resources

I wore the Red Interlock Knit Version of this tee for Christmas and plan to wear it for Valentine's Day. I've certainly been wearing it since the holiday, because I love it's fit, color and feel http://meencantacoser.blogspot.com/2014/12/fitted-red-tee-in-time-for-christmas.html

My Princess Laurel Tee - I used Floral Velour the first time I made a tee with this pattern. I've worn this shirt quite a lot as well. http://meencantacoser.blogspot.com/2014/12/terminado-my-princess-laurel-tee.html

Auntie Seama Rippah and I aren't really the best of friends http://meencantacoser.blogspot.com/2012/11/avoiding-auntie-seama-rippah-for.html

Tuesday, December 23, 2014

Fitted Red Tee in Time for Christmas, Valentines, and Any Day I want to feel cheerful (Vogue 8323)


I'm loving my "Princess Laurel" tee from Katherine Tilton's, Vogue 8323 so much that right after I made it up in floral velour, I repeated the deal in this Christmas'y/Valentine'ish light weight, red, interlock knit. This Katherine Tilton pattern, Vogue 8323, is a princess-seamed, very fitted, tee shirt.

There's more about my experiences sewing this tee in this month's December audio/podcast, Enchanted by Sewing - Festive Holiday Tees and Tea (#27)

Saturday, December 20, 2014

Terminado! My Princess Laurel Tee

There's more about my experiences sewing this tee in this month's December audio/podcast, Enchanted by Sewing - Festive Holiday Tees and Tea (#27)
Hoping to get another photo where the center of the shirt 
doesn't pull up on me! It isn't really THAT fitted.
I've been wearing this princess seam tee 
quite a lot for a week (layered)
I call this my "Princess Laurel" tee because

1) It's named after myself
2) It has princess seams
3) When I was little, my older sister Trisha kept me entertained with stories about her flights to Treasure Land. Apparently she went there every night after I went to sleep. She had a magic plastic comb with genuine diamels that she used to transport herself! One day she brought me a pair of shoes decorated with sequins, that looked, oddly enough, like my old slippers that had gone missing! In Treasure Land, amazingly, there were two princess that looked exactly like us - Princess Laurel and Princess Trisha!

I was a true believer in Treasure Land, and begged her to take me along one night. She promised she would when I was a little older, but I think the comb was lost when we moved and I never got to go.

This floral velour tee shirt is named in honor of the royal garments that Princess Laurel once wore, 

I really like wearing this Katherine Tilton  Vogue 8323, princess-seamed, very fitted, tee shirt. I made this first version in a floral velour (I think that's what it is - the fabric was a freebie from donations made at school), that I think is probably mostly polyester with some spandex. I've been wearing the shirt over a pale pink turtleneck or a black turtleneck, as it's not very warm. It looks pretty without them though, and I look forward to getting a photo of those.

I embellished the shoulder seams with
pale rose glass beads and twists of fabric

I added some pink glass buttons and twists of fabric on the shoulder seams, for fun embellishments. Isn't it great sewing your own clothes and doing stuff like that? Impromptu embellishments like that are just one of many things that keeps me, enchanted by sewing!

The pattern work was harder than I thought - getting the fit lines to mirror my body. I've found that my dress form Conchita is pretty good for getting basic fit areas, but when it comes to absolutely fitted, nothing beats putting the garment on my own body and checking it out in the bathroom mirror (or with a buddy like the day Susan H came and she marked all over the inside for me). One thing I learned was, not to make the adjustments to the princess seams permanent before I added the sleeves! The sleeves pull the fabric back, over and all which ways. Baste, Baste, Baste!  Oh, I had some fun with Auntie Seamah Rippah and all the seams I thought were ready for regular stitching but really weren't!

I employing my lesson about basting while making another plain red version of this tee, which I look forward to blogging about. It's almost done. Of course being a different piece of knit - a kind of fluid interlock, the red knit had to be taken in a little more. And of course the self-fabric neckband had/has to be fit differently.

Getting the neckband on this floral version in right such that it didn't gap and wasn't too tight was a real challenge. I basted a lot with pins and by hand. I also laid it over my duct tape dummy (remember Helen?) to get a sense of how the neckline would fall on my actual body. Boy, no neckband is the same.

Also I think since this neckline mostly curves at the center, then shoots up almost straight, I think the trick is a slight stretch on the curvy center part, then less stretch as it goes up. 
Great tee. I have fabric for a few others that I hope to make soon, while the alterations and fit challenges are fresh in mind. Also I just love the way it looks on, so I want more!


~ ~ ~
Web Resources
My Early Pattern Work on V8323 http://meencantacoser.blogspot.com/2014/10/princess-seamed-tee-shirt-pattern-work.html

http://www.katherinetilton.com

Thursday, October 30, 2014

Ench By Sew-025: Restyling


Hey! 
The latest Enchanted by Sewing Podcast has been published!
Listening Option I) You can listen to the show right on the web by clicking on this link
~ OR ~
Listening Option II)  Click on this link to iTunes  to download this and other Enchanted by Sewing shows to your mobile device (iPhone, Android, etc.) free from iTunes 
https://itunes.apple.com/us/podcast/enchanted-by-sewing/id566370325)

This month’s show  is  Restylin’.
It all came about when I started shaking the dreams from my hair. Restylin' is about my transition in sewing and wardrobe style . It involves looking at patterns in a new-to-me way, and working my brain around ways I want clothes to fit me.

The Enchanted by Sewing Podcast is, an extension of my regular sewing blog - Me Encanta Coser, which,  roughly translated means, Enchanted By Sewing 

My blog is written in English. The name celebrates the historical and modern use of the beautiful Spanish Language in the San Francisco Bay Area of California, where I live. 

This month I’m working on creating two tee shirts M6078 and V8323. The details are in these blog postings from MeEncantaCoser.blogspot.com
V8323 - Princess Seamed - Katherine Tilton Tee http://meencantacoser.blogspot.com/2014/10/princess-seamed-tee-shirt-pattern-work.html

M6078 - Retro Style Polka Dot Cowl Neck Knit top - Reminiscent of I Love Lucy http://meencantacoser.blogspot.com/2014/10/reworking-retro-style-polka-dot-tee.html

1) Pensamientos Primeros
– (Sewing) For my wardrobe’s sake (How about those red accents!)
2) Technicos  
Reworking my sewing style/methods. Pattern alteration experiences.
3) Pensamientos Finales
Transitions - Restyling  

David Crosby sang, 
“I almost cut my hair
It happened just the other day . . .”

4) Epiologue 
Redefining what I want to create

* * *
Restyling has me  shaking the dreams from my hair.   That’s just one more thing that keeps me . . . 
Enchanted by Sewing.


Wednesday, April 2, 2014

Seams To Fit Part 1: A Little Less Laxity - Learning Precision

I'm improving a lot of sewing skills while working on my bustier project. For one thing I'm doing more pattern work, which is not only helping me to practice creating a physical pattern (I began with a commercial pattern and altered it - a lot). Also I'm learning to use the actual resulting pattern in new ways. 

I've changed my concept of when to create a seam allowances, at least for this very fitted garment
Creating a pattern with no seam allowance, is starting to be useful
Typically, when working with a woven fabric, I've used the standard 5/8" seam allowance that comes on a commercial pattern, or else added that same measurement to my own pattern. I knew that traditional patterns are often created with no seam allowances (Burda Magazine patterns are an example), but I didn't understand why that was done. Now I have a reason to leave that allowance off the pattern.

It has to do with fit.

I don't usually make fitted garments. If the seams I sew in, say, a loose shirt project aren't absolutely, precisely the same as the original pattern it's probably not a big deal. I sew the back to the front at more or less 5/8" away from the cut edge. A little extra or less between a couple of friends, and you're not going to notice the lack of precision in the finished project. 

 A bustier, however, is an ultra-fitted garment. In addition it covers much less body area than that loose shirt. Oh, and by the way, instead of that loose shirt's one back and one front piece - the back of my bustier is three pieces. The front is five pieces - several of which are extremly narrow. And those eight pattern pieces cover less surface area than the loose shirt's two.

If I'm at all casual about the seams whose positions I've carefully detailed while fitting this pattern, the garment is in danger of being too tight to fit. Or it may simply fall off!

I need to know, when I sew, that the seams I planned to sew during the fitting stage, are the ones I actually do sew. The first important thing I do to achieve that goal, is by marking my seams accurately. My goal is to get the seams within 1/8" of what I've decided is correct. I may still loose a little one way or another. My final back and front seams will make up any final corrections, but if it's very much off it will be noticeable. I want to avoid that.

Next Posting - Seams To Fit: Making My Mark  


Friday, October 19, 2012

Technicos/Techniques: Sewing a Fitted Facing


How to Sew a Fitted Facing to a Neckline


A facing is a piece of fabric that encloses the raw edge of a garment.  It is sewn to the raw edge and then turned to the backside of the garment.
1)   Cut Facing same shape as main garment edge it is used to face
2)   Cut a piece of interfacing the same size as the facing
3)   Trim ¼” from interfacing so smaller than actual facing, all the way around
4)   Fuse interfacing to wrong side (WS) of facing
5)   Stitch ¼” from lower edge of facing
6)   Roll under at stitching line, press under (stitching keeps you from burning your fingers!)
7)   Topstitch hem of facing, close to fold
8)   Sew Right Sides(RS) together - facing to the garment edge
9)   Grade and clip seam allowances (SA) - cut back the facing LOWER than the main garment edge
10) Press facing to inside. Press the SA towards the facing piece
11) Understitch facing – Stitch all around the neckline-through the  facing and SA close to seam line, but  NOT through the main garment piece. This helps the facing lie flat. Press WS's together