I love to use Pinterest as my virtual bulletin board. As you might guess many of my pins are sewing related. Click here to see what fun stuff I've found and pinned to different sewing boards.
Showing posts with label fitting. Show all posts

Saturday, June 18, 2016

Fitting Pinto: (M6076)Sleeveless Princess-Seamed Shirt - Perfect for Summer Temperatures

The word "pinto" in Spanish does indeed refer to a specific kind of bean
It also means "spotted" or "speckled" !

Last fall I first fitted a sleeveless version of M6076. I called my first version of this shirt Western Winds. I've been reaching for my Western Winds shirt repeatedly in these warmer days. It's on the wash line every time I hang up clothes. To prevent fading I machine wash my own-sewn garments but I hang them to dry on plastic hangers on our clothes line . There is really no more time involved, as the hangers can go straight into the closet once dry.

There is no sleeveless version in the pattern, so I worked out where I wanted the armscye to be cut. A french curve ruler really helps with that. I did create a muslin for that original version.

I'm finding that, despite marking up my first-version master pattern tracing and markup of the master pattern, as well as that muslin, I'm still needing to do a lot of basting on Pinto, both with a basting stitch and safety pins. I'm hoping the altered cutting and stitching lines I just made to the last version of the pattern will help me make the next version of this shirt more quickly! I marked all alteration cut and stitch lines in a specific marker color and dated them too. One thing I've learned about altering patterns is to do that. I've also learned that different fabric, in a fitted garment, need slight differences in the amount of seam allowance.

My side and shoulder seams are still basted. Next step is to sew over them with a regular stitch length.

As you can see I also haven't yet added the facing or collar. To make sure the various seams in this fitted shirt hung right I safety pin basted the two front pieces up the center front line for the time being. I can still pull the shirt over my head for fitting.

~ ~ ~

Completed Western Winds - Last Version of this shirt http://meencantacoser.blogspot.com/2015/10/western-winds-terminadofinished.html

Thursday, February 25, 2016

Ench By Sew-41: Fit for a Princess – Fitting Princess-Seams


Click on this link in iTunes  to download the 41'st episode of the Enchanted by Sewing Audio Podcast,  recorded in February of 2016. Or listen directly on the web by clicking on this link.


What is a princess-seam? A princess-seam is intended to mirror the shape of a woman’s torso. It’s a long, lengthwise curved seam midway between the side seams and the center of the garment. You might see a princess-seam in a women's nightgown, camisole, swim suit, blouse, shirt, dress, or coat. The lines you’ll typically see in a bustier, or merry widow garment, are a good example of princess-seams.

Princess-seams are sewn into the front and/or back of a shirt. They may start at the low or high hip,  the waist , or wherever the bottom of the garment is. In a fitted cropped top they’ll start at that bottom crop point, in a dress or coat, without separate skirt pieces, they are probably at the hemline. A princess-seam usually moves up to the armscye (armhole) or to the shoulder seam.

Often a princess-seamed dress does not have a separate waistline at all, since it does its shaping without darts. A -Line dresses often have princess-seams.

Well executed princess-seams can add a long sliming look. 

In this episode 

Primero /First  -  Royal Reflection – My own ideas about sewing history and choices I made for my recent princess-seam sewing.

Entonces/Then – Technicos for Princess-Seam fitting – What techniques I’ve been using to fit my princess-seamed shirt pattern

Resources:
* For my princess seam pattern,  I used M6076 0 a Palmer and Pletsch pattern
http://mccallpattern.mccall.com/m6076-products-10887.php?page_id=482


* Coco  Chanel's Sleeves https://cloningcouture.com/2014/08/04/chanel-and-the-sleeve/


Friday, January 30, 2015

Ench By Sew-028: A Very Fitting Sewing Day With Susan

This show is created, produced and brought to you by Laurel Shimer.

A Tule Fog in California's Sacramento/San Joquin Delta
Susan's Living in the Historic Land of Tules These Days!
Hey! 
The latest Enchanted by Sewing Podcast has been published!

Socializing over sewing never gets old. It's that’s the kind of thing that keeps me . . .  enchanted by sewing.

Listening Option I) You can listen to the show right on the web (while sewing perhaps?:-) by clicking on this link 

*****
~ OR ~
Listening Option II)  Click on this link to iTunes  to download this and other Enchanted by Sewing shows to your mobile device (iPhone, Android, etc.) free from iTunes

The Enchanted by Sewing Podcast is, an extension of my regular sewing blog - Me Encanta Coser,  (http://www.meencantacoser.blogspot.com) which,  roughly translated means, Enchanted By Sewing

My blog is written in English. The name celebrates the historical and modern use of the beautiful Spanish Language in the San Francisco Bay Area of California, where I live.

Bruce - "Scored Mom's Boho Bed!"
This month’s show  is  *A Very Fitting Sewing Day with Susan*
Recently I went to visit with my buddy, Susan, and her household’s two dogs, Bruce and Bain. You’ll hear Bain’s comments at various times during the show, just the way you occasionally hear some of the audio from things in my house like the train that runs just behind our yard. I’m partial to including a little locally occurring audio ,because it adds another sense to the personal journal style of the show.

Don’t you feel like you know Susan by now?  I’m always mentioning her and the time we’ve spent together in this show. This month I got a chance to share a sewing day at Susan’s house with you. It started out as an interview, but it became a duologue – even when I cut out several of the places where I interrupted!


Bain - "Aren't I a Good Dog?"
Pensamientos Primeros/First Thoughts . . . we talked  about our sewing relationship and some of the non-sewing things that give you a sense of who Susan is and what drew us together.


Entonces/Then . . . we talked about some of the things that she learned about fitting patterns, that I’ve benefitted from over the past couple years.


This month's Pensamientos Finales/Final Thoughts . . .  are scattered throughout the show as we each share with you a little something about where Susan is living. The area she’s recently moved to has a very long-term historic role in agriculture and pre-agriculture, within California, that has provided people with both food, fabric,  and more, for over 4,000 years. 


I wrote a posting showing some of the gorgeous tapestry purses Susan made for holiday presents. As you can tell, not all the bags were completed when I took the photo. back in early December. http://meencantacoser.blogspot.com/2015/01/tapestry-pursestotesbags-sewing-day.html

Susan designed and sewed these San Francisco Giants take-it-to-the-game cold drinks bags for a number of lucky relatives for Christmas presents.

Blue Ice fits inside

After the interview Susan and I talked more about our sewing plans
We both liked Vogue V1412 for her
Recently she texted me to say that she has started working on it
~ ~ ~
Web Resources


Remember when Susan Sang Backup for Neil Young?
Neil Young Interactive Greendale http://www.nygreendale.com

Neil Young - Greendale Album http://en.wikipedia.org/wiki/Greendale_(album)

Tutorial - Full Bust Adjustment and Small Bust Adjustment http://www.craftsy.com/blog/2014/07/how-to-make-a-full-bust-adjustment/

A Threads Article about the book Susan talked about in this interview, Fitting and Pattern Alteration by Elizabeth Leichty, Judith Rasband and Della Pottberg-Steineckert

Discovery Bay: Geography and Agriculture Interest


Tule Fog

Invasive water hyacinth threatens the Delta http://www.mercurynews.com/my-town/ci_27358407/delta-water-weed-problems-called-worst-years 
I was reading up on Discovery Bay, which is in the Sacramento/San Joquin delta, cause my buddy  lives there. You read a lot of CA history about the San Francisco Bay and Golden Gate in relation to first nations people, European explorers and Gold Rush, but less about the agricultural and natural harvesting food value of the Delta region to people over the last 4,000 plus years - which continues today. Looks like these creepy little weeds have a big impact on the value of this region. Unclear how they arrived, but invasive plants have a way of doing that and the drought has made the situation worse...

Saturday, December 20, 2014

Terminado! My Princess Laurel Tee

There's more about my experiences sewing this tee in this month's December audio/podcast, Enchanted by Sewing - Festive Holiday Tees and Tea (#27)
Hoping to get another photo where the center of the shirt 
doesn't pull up on me! It isn't really THAT fitted.
I've been wearing this princess seam tee 
quite a lot for a week (layered)
I call this my "Princess Laurel" tee because

1) It's named after myself
2) It has princess seams
3) When I was little, my older sister Trisha kept me entertained with stories about her flights to Treasure Land. Apparently she went there every night after I went to sleep. She had a magic plastic comb with genuine diamels that she used to transport herself! One day she brought me a pair of shoes decorated with sequins, that looked, oddly enough, like my old slippers that had gone missing! In Treasure Land, amazingly, there were two princess that looked exactly like us - Princess Laurel and Princess Trisha!

I was a true believer in Treasure Land, and begged her to take me along one night. She promised she would when I was a little older, but I think the comb was lost when we moved and I never got to go.

This floral velour tee shirt is named in honor of the royal garments that Princess Laurel once wore, 

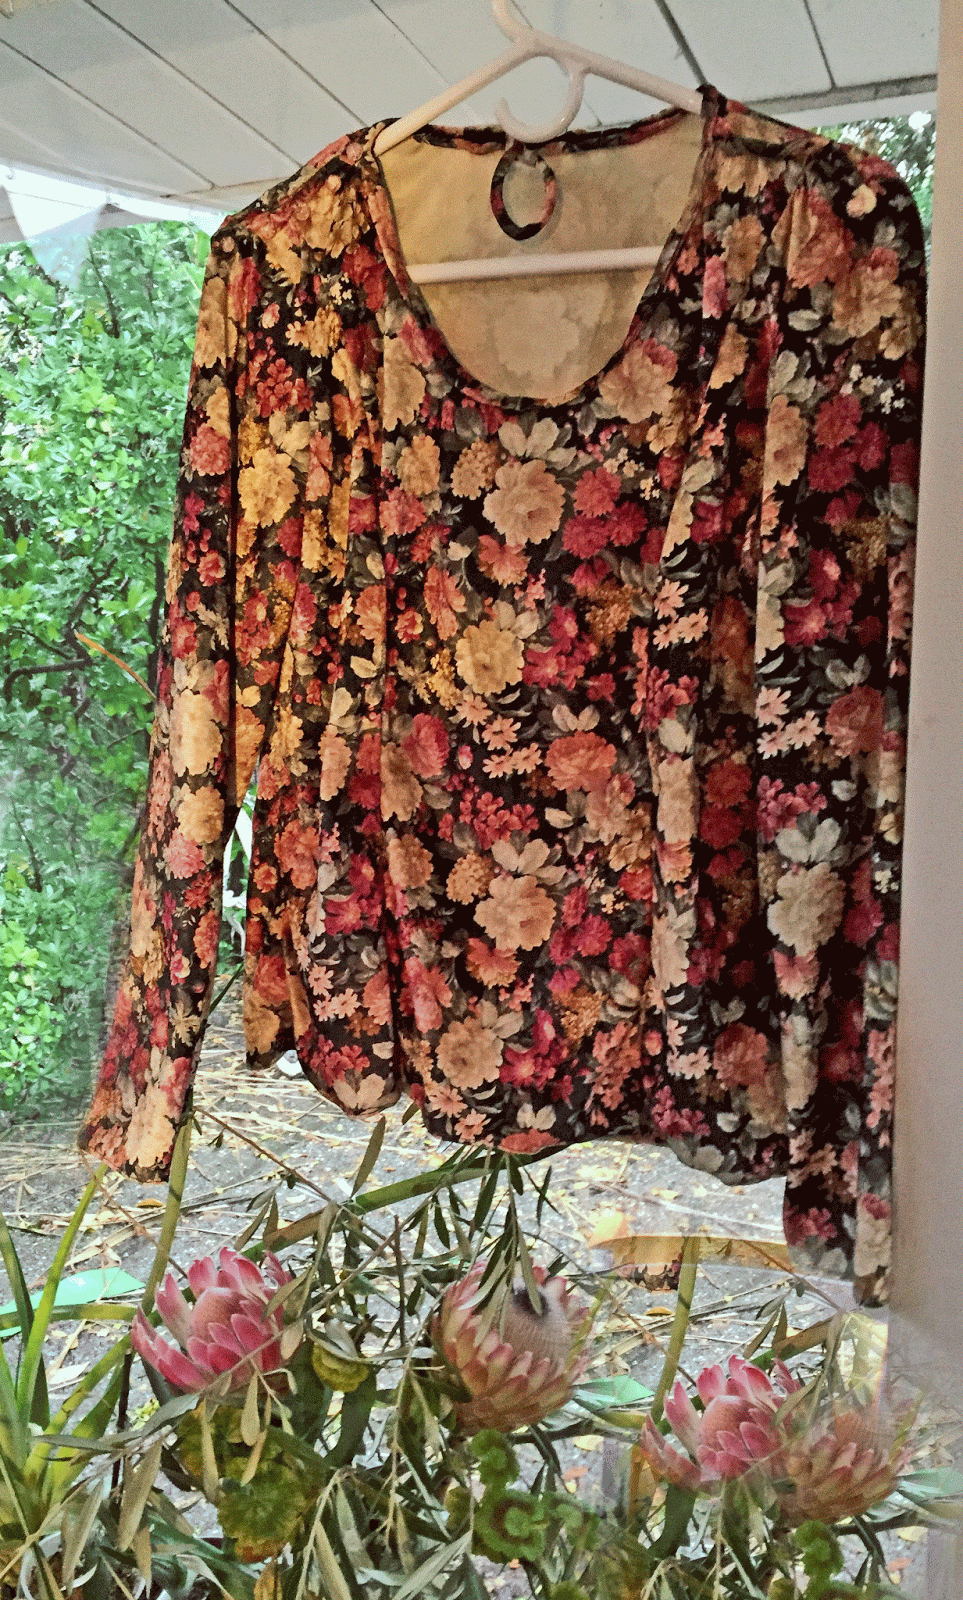
I really like wearing this Katherine Tilton  Vogue 8323, princess-seamed, very fitted, tee shirt. I made this first version in a floral velour (I think that's what it is - the fabric was a freebie from donations made at school), that I think is probably mostly polyester with some spandex. I've been wearing the shirt over a pale pink turtleneck or a black turtleneck, as it's not very warm. It looks pretty without them though, and I look forward to getting a photo of those.

I embellished the shoulder seams with
pale rose glass beads and twists of fabric

I added some pink glass buttons and twists of fabric on the shoulder seams, for fun embellishments. Isn't it great sewing your own clothes and doing stuff like that? Impromptu embellishments like that are just one of many things that keeps me, enchanted by sewing!

The pattern work was harder than I thought - getting the fit lines to mirror my body. I've found that my dress form Conchita is pretty good for getting basic fit areas, but when it comes to absolutely fitted, nothing beats putting the garment on my own body and checking it out in the bathroom mirror (or with a buddy like the day Susan H came and she marked all over the inside for me). One thing I learned was, not to make the adjustments to the princess seams permanent before I added the sleeves! The sleeves pull the fabric back, over and all which ways. Baste, Baste, Baste!  Oh, I had some fun with Auntie Seamah Rippah and all the seams I thought were ready for regular stitching but really weren't!

I employing my lesson about basting while making another plain red version of this tee, which I look forward to blogging about. It's almost done. Of course being a different piece of knit - a kind of fluid interlock, the red knit had to be taken in a little more. And of course the self-fabric neckband had/has to be fit differently.

Getting the neckband on this floral version in right such that it didn't gap and wasn't too tight was a real challenge. I basted a lot with pins and by hand. I also laid it over my duct tape dummy (remember Helen?) to get a sense of how the neckline would fall on my actual body. Boy, no neckband is the same.

Also I think since this neckline mostly curves at the center, then shoots up almost straight, I think the trick is a slight stretch on the curvy center part, then less stretch as it goes up. 
Great tee. I have fabric for a few others that I hope to make soon, while the alterations and fit challenges are fresh in mind. Also I just love the way it looks on, so I want more!


~ ~ ~
Web Resources
My Early Pattern Work on V8323 http://meencantacoser.blogspot.com/2014/10/princess-seamed-tee-shirt-pattern-work.html

http://www.katherinetilton.com

Saturday, April 12, 2014

Seams to Fit Part 4: Neat as a Pin (Technicos)

Using pin techniques to join sections of my bustier precisely.


The outer shell of my Bustier is coming along
Too bad I can't just pin it to myself and head out the door


Seams To Fit Part 1: A Little Less Laxity 
Seams To Fit Part 2: Making My Mark 
Seams To Fit Part 3: More Power to Interlining!

Pinning seams becomes extra important when working on sewing narrow, curved, very fitted pieces together. I wanted a stitching line that runs precisely along the stitching line I created when fitting the test garment and creating the pattern. It went a bit against my casual, arty bent to be concerned with being as neat as a pin. It just wasn't a natural skill for me, and I had to think carefully about the process.

In my last "Seams To Fit" posting, I described how I used stitching marks on my interlining pieces to define the stitching lines on the fashion fabric it's backing. In both part 2 and part 3, I described how I made sure the fashion fabric was matched up properly.

Now that I was getting ready to sew each bodice piece together, I began to think of each piece as more of a section. That section is composed of one appropriately shaped piece of fashion fabric (the denim that shows on the outside of the bustier in my case) backed by an equivalently shaped interlining (a blue plaid cotton flannel). When it's prepped, one section is like one pattern piece.

At this point in the process, I needed a way to join the stitching lines of each section precisely to it's neighboring section. When working on doing the same operation on the inner fitting shell of the bustier (then I was joining the cutil/lining pieces together) I'd found this to be rather challenging. I was constantly turning the sections over and finding that the pins weren't going through into the stitching lines.


I marked the stitching lines all the way around each section
with pins, using the stitching lines marked on the interlining
I figured out the best way for me to get the sections joined together precisely, the second time around. In part 3, I describe how I'd marked each section (equivalent of one pattern piece) marked all the way around with pins. The pin heads show on the interlining side. Now, I could line up each section (one fashion fabric/interlining section for each pattern piece) with it's corresponding section. 
Working pins through from the stitching lines on one section
to find the stitching lines on the other side.
Here you can see a couple of pins I've already pinned through from the other side.
These are ever so slightly off!
When I laid, for example, piece 1a next to 1b, putting the fashion fabric (right sides) together, I now had pins on either seam line. I moved down the marked/pinned stitching lines pinning in the direction of the seam. As I moved, I worked another pin from one side of the stitching lines into the set on the other section. My fingers could feel that the pins were marrying up. I could, and did, still flip the sections back and forth, but it went a lot more easily than it had in the inner shell.


The only Photoshopping I did was to
change the fabric of my dress form, and
swap the real background for my little
gingham and scissors creation:-)
When I went to do the actual sewing, things just sewed up better. I only had to stop and unstitch a very short distance once. 

The proof is in the denim pudding. My bustier's outer shell is coming along and fitting snug and right.

The fitting shell that goes below will provide the support the garment needs to allow the garment to leave my dress form and head out into the world.

Figuring out techniques for sewing seams precisely is one of those thing that keeps me...
Enchanted by Sewing! 
~ ~ ~
Web Resources

Boning Up On Bustiers: http://meencantacoser.blogspot.com/2014/03/ench-by-sew-018-boning-up-on-bustiers.html

My Pinterest  Bustiers Board 


Wednesday, April 9, 2014

Seams to Fit Part 3: More Power to Interlining! (Technicos)

Using  stitching marks on my interlining pieces to define the stitching lines on the fashion fabric it's backing.              

Previously
Seams To Fit Part 1: A Little Less Laxity 

Seams To Fit Part 2: Making My Mark 

I figured out how to take advantage of my interlining, to help match the seams on my bustier project.

What is interlining?
Interlining is like a piece of backing for a garment's fashion fabric. In this bustier project, my fashion fabric is denim. My interlining is a piece of plaid 100% cotton flannel. You will never see the interlining once the garment is done, even on the inside. That's because this garment will have a second shell that includes lining. The interlining will be sandwiched in between the lining and the garment fabric.

I cut the interlining just like I cut the fashion fabric.

The interlining is just sewn on underneath the piece it backs.  I treat the two pieces of material as though they are just one piece of fabric. The back/wrong side of the interlining is sewn to the back of the fashion fabric.

Why did I used interlining in this garment?
Typically interlining is used to make a fashion fabric more stable and give a little less. For example you might use interlining with linen to make it crisper. (In which case you might cut the interlining just a little more narrow - a good trick, eh?)

In this case, I used interlining as a layer of extra protection because of the bones/stays that are in the next layer below it. It helps avoid the chance that these bones will slip out and poke into the outer/fashion fabric layer.


How I took advantage of my interlining, to help match the seams on my bustier project.

Because this bustier has really small pieces, and is really fitted, I marked, then sewed through, the stitching lines all the way around on my interlining pieces. I just sewed through that one layer, to make the seam/stitching lines really clear. 

I also marked all the stitching lines on the inside of my fashion fabric. I could have basted those lines, then matched up the stitched lines to ensure that my seams are precise.

But I really don't like having to take all those basting threads out of the fashion fabric. Also, sometimes they're hard to remove, especially if I sew over them.

Since I have the stitched lines on the interlining and the marked lines on the fashion fabric, I was able to slip pins through from the interlining into the marked line and pin the interlining layer to the fashion fabric layer all the way around the piece. I could easily check on the fashion fabric layer to see that the stitched line above was marrying up right with the marks all the way around.

I repeated this process with the adjoining piece - both on the fashion fabric and the interlining fabric - then joined the seams of the two pieces together, slipping the pins from one seam line marking into the one below. I was able to constantly check my pinned stitching lines, to make sure that the seam line below was matching up properly with the seam line on the top.


Figuring out how to sew narrow garment pieces together precisely, and save time removing basting stitches later on, is the kind of technique that keeps me....
Enchanted by Sewing.


~ ~ ~
Web Resources

Boning Up On Bustiers: http://meencantacoser.blogspot.com/2014/03/ench-by-sew-018-boning-up-on-bustiers.html

My Pinterest  Bustiers Board 


Saturday, October 19, 2013

Jeans Sewing: Looking Jeans'y - A Jeans Fit Garment (fit)

One day I put them on and...
Even without a waistband
I could see they were starting to
look like real jeans.
Drafting, drafting drafting. Pattern drafting is a great new learning experience and, oh yeah, it takes a lot of time.

At some point I just wanted to know how the pattern I was creating over and over in muslin was going to look in the real deal ....
Denim

And, just as I learned with my jeans-style denim skirt, I found that the denim draped totally differently than the muslin. More challenging yet, I was working this time with denim with lycra. Guess who looked like the saggy baggy elephant? No, sorry. I just couldn't take a photo.

How many times did I take in the seams? Four on the side seam and twice on the inseam. 

Then one day I put them on and low and behold, they were starting to look like jeans!

It's times like these that keep me...

Enchanted by Sewing

Monday, September 30, 2013

Friday, September 6, 2013

Draping With a New Retro Friend

Eventually I'll be draping on my own
Uniquely You dress form, but for the first few assignments
we use the school's forms.
I fee very lucky to be matched up with this lovely
lady, created in 1965.
This year I created and began to use both a duct tape, and Uniquely You dress form. These new fitting companions have helped me to fit patterns, muslins, and garments.

I learned so much getting started with these dress forms, that my September Enchanted by Sewing Podcast show, will be about what I've learned creating and using these dress forms. 

Still, there's more to come.

This fall I'm taking the Draping class at Cañada college. There I'll be learning the art of draping, and I can see that it truly is an art. I'm just beginning to develop my eye, use my fingers to smooth the fabric as I drape, and starting to learn where the material is telling those fingers it should go. It's pretty exciting to think that by the end of the semester, I should know enough to draft some of my own patterns - patterns that are made just for me, by me!

We're using the Connie Crawford Art of Draping book. I've listened several times to the Sew Forth Now podcast, where Lori interviewed Ms. Crawford (Sew Forth Now #35: The Industry) and enjoyed the story of how this very experienced woman came to create this book.

The dress form I'm currently using in class (I'll be using my own Uniquely You dress form later on in the semester) is a 1965 model. Just think how many students have learned to drape and sew with her! I compared her with some of the newer forms, and noticed that she is, as our teacher says "perkier". That is, her bust is more enhanced than other more modern dress forms. Yup, shapely chests were popular in the middle of that decade.


I'm so pleased I've been teamed with this retro 60's gal. 
It's sewing companions and classes like this that keep me....
Enchanted by Sewing
* * *
You can find Lori's interview with Connie Crawford on the Sew Forth Now Podcast  

Sunday, July 21, 2013

Squeezing in the Sewing - Personal Project Kits (Organizing)


Kit 3 - My Duct Tape Dummy, Helen, has
been such a help as I learn about fitting.
Here, she's hanging out on her chair as
I fit  the
Hot Patterns Weekend Sunshine Top 
to her physique.
I'm taking a dress-form making class in
summer school, which is why I haven't concerned
myself with improving Helen's filling or
figured out some kind of stand for her.
I've been making myself the gift that keeps giving- several sewing kits.

Our household has been going back and forth when it comes to time for favorite activities, mostly on the negative side for sewing. Yet, by dint of staying up  really late a couple of different nights, I managed to get a couple of different pattern fitting projects in along with putting in a little more time on jeans techniques sample sewing.

It was tempting to simply cut one thing out from my fitting work, and sew it, for sheer satisfaction, but instead I made myself a bunch of ready-to-go sewing kits, because I know I've just got a short lull  before things get super busy in the house. Bet you know the difference it makes to have a project all ready to sew and go when you have twenty or thirty minutes to squeeze in some precious sewing time.

I made four kits so far, and am hoping to squeeze in one more before I put away all the fabric and patterns I dug out. That' something I have to do, since I share my sewing zones with other folks. The other residents of the household have needs too, and none of them involve stiching!

My kits are just zip lock bags - the gallon size (I think). There the same ones that hold a pattern and all it's pieces so handily. Do you have a big tote bag of those that you recycle from sewing project to sewing project like I do?

Kit # 1: B5526 Shirt - a.k.a. my No. 1 Lady's Detective Agency Shirt cut out in lavender Robert Kaufman gingham with a half meter of Liberty of London Tana Lawn for cuffs, collar and other contrast/highlight areas.

Kit # 2:  B5526 Shirt - a.k.a. my No. 1 Lady's Detective Agency Shirt cut out of 1 and 1/2 meters (Woof! how did I squeeze that one out!) of a green and cream Liberty of London Tana Lawn print with a half meter of Tana Lawn in purple background Strawberry Thief print for cuffs, collar and other contrast/highlight areas.

Kit # 3: New (to me) tee shirt, the Hot Patterns Weekend Sunshine Top . I've had this half-muslined since last fall (!). It's now fitted (thanks to my Duct Tape Dummy Helen) and cut out in a pink jersey knit (rayon/poly from Fabric.com) with white pin dots. I sure hope I see that note in the zip lock bag reminding me to use a streeetttcccchhh needle when I go to sew. If I don't use one of those needles with jersey knits I definitely get holes.

Kit # 4: A test garment tee from my standard most-basic tee shirt pattern (B3383). This is the kind of thing I'll get some use out of (assuming I'm happy with the actual fit) but not a long-term commitment garment. I cut out the shirt from two commercial tees that I bought on a trip to Vancouver Canada last summer. Inexpensive tees are my favorite way to get a test garment going on a tee shirt pattern, and I can always use another basic tee.

Kit # 5: Butcher's Apron-  In progress. About a yard of very appealing "Dick and Jane" fabric I've been holding onto for too long (I don't want to see my fabric inventory get stale!) , in combination with another remnant - a kind of stiff black cotton with white dots - and some red bias binding is going to form an addition to my wardrobe of much-used household aprons.


Organizing personal project sewing kits is a gift to myself. 
It keeps me enchanted by sewing.

Saturday, July 6, 2013

Fitting the Tee - Every Knit is Different - Duct Tape Dress Form

What do I love most?
 The embroidered hummingbirds?
The under-bust tucks?
The fringy bits I created from knit scraps?
The deconstructed neckline?
I've been squeezing in a little time here and a little time there on this simple rose pink tee with the embroidered hummingbirds. It's been one of those life-is-sometimes-like-that times. Bet you know how that goes :-)

It's a funny thing, I'm using a tee pattern I've altered in the past and sewn several times, but this time through the tee just didn't hang right on me. I'm so glad Lori addressed the variable character of knits so many times in different Sew Forth Now podcasts. Now I know it's not just me who has these challenges. You just never know with knits, they each have their own drape and stretch.

In this case, I admit that I was working with a very flimsy knit. I cut this shirt out of two rose pink commercial tee shirts. I keep them around more as muslins then for my regular wardrobe. But.... they were a pretty color and I just wanted a quick tee fix.

That's where the front detail came from. After doing the machine embroidery (I posted about those dragonflies last time) I just didn't love the way the shirt hung, so I added a little hang of my own.
Don't you love that elegant view of the
old newspapers coming out of the neckline of
my Duct Tape Dummy (DTD)?
It's not glamorous, but it helps her keep her shape for now
I'm not worried about filling her up properly, 'cuz
I'm actually taking a Dress Form Making class !
So, no, my little DTD is never going to be properly filled.
Hey, you knew I was going to show off the value of my Duct Tape Dummy again, right?

I first got out my lovely Dummy after I tried on the shirt and found I didn't like the typical fabric neckband. I did the slight stretch and fold over fabric neckband thing and no matter how much or how little I stretched the neckband/trim, the shirt  reminded me of something Beaver Cleaver wore. So I unpinned and unabasted (never commit the stitches till I'm sure!) and created this deconstructed neckband instead. It's simply a strip of black knit I cut off the bottom of another tee and then twisted and pinned, twisted and pinned all the way around. It's actually still pinned (as is the decorative bit in the front) waiting for sometime soon when I get a chance to sit and do a little hand stitching. The under bust strip is the original unsuccessful  neckband (which was shorter than the new deconstructed one), pinned in place over some tucks (or would you call them darts?) I just pulled in place by hand and safety pinned. I twisted that strip in the same way that I did the deconstructed neckband. 

I created the fringed bits in the front  from
- The ends of that strip hanging down
- Additional strips I added in and braided a little bit at the top
- Scraps of the rose pink I bound around that 
- Cutting each strip in half or thirds to make more and thinner pieces
Entonces... Finally I hung onto the top of each strip and pulled on the opposite end to get a longer, narrower rolled , dangly, fringy piece


Filling in the time gaps with my rose and  black tee shirt , adorned with hummingbirds and creative scrap embellishment really keeps me enchanted by sewing.

Saturday, April 27, 2013

Duct Tape Dummy Stands Up (fitting/duct tape dress form)

My Duct Tape Dummy (DTD) isn't exciting
But she Stands Up to Sample Sewing
This is fleece scrap I used to test some of the
 basic concepts I'm altering

I've been working on a fleece jacket, with sleeves that button off and on. I haven't had the heart to blog about the project, though I've been spending an awful lot of my recreation time muslining and altering a fleece jacket pattern I've made successfully in the past. I'm using a combination of home dec fabric for the button'y parts and fleece for the majority of the jacket.  I'm still at the just-don't-know stage. I would not recommend doing button on/off with fleece at this stage!

This project has given me an opportunity to use my Duct Tape Dummy (DTD) that Susan and I made over spring break. Actually, Susan did all the work on me. The one I attempted to make on her, was not a success. Yes, I do owe her, and plan to drive back over the hill one day very soon to strap her up. I didn't do the tape tight enough on her. Watch out for that if you are planning a similar project.

Though my actual DTD isn't nearly as elegant as my lovely tree-maiden vision (Did you see that posting? http://meencantacoser.blogspot.com/2013/03/dtd-planning-duct-tape-dummy-fitting.html) she does her duty. 

Yes, that is Hello Kitty duct tape. I also learned that you don't get nearly as much duct tape when you buy decorative duct tape, as when you get the basic macho version. That's what's underneath the kitties. Also I think we went through at least 2 rolls of the macho-duct tape, just in the bottom two layers (3 layers of duct taping in the whole thing). To be safe, I'd recommend 3 rolls of the macho duct tape (the kind you might actually use for duct work) and 2 rolls of decorative for the top layer. 

I still haven't fully stuffed my DTD. For the time being, she's partially filled with plastic newspaper bags, regular recycled newspaper and an old sheet. When I use her, she sits on the table, then goes to bed in a big plastic garbage bag (but well hidden so that nobody will toss her by mistake).

That DTD of mine is a kind of frowzy gal, but she knows her job.