I love to use Pinterest as my virtual bulletin board. As you might guess many of my pins are sewing related. Click here to see what fun stuff I've found and pinned to different sewing boards.
Showing posts with label tutorial. Show all posts

Thursday, February 23, 2017

MOB Camisole Straps - How I sew them (Using String - Not Bodkin)

Find an Audio Description in the February podcast 'A Camisole for the Mother of the Bride'.

When it comes to creating a shoulder strap - bodkins work for many folks - but not for me. Plus, I always misplace them!

I use an encased-string method. I think I may have read about this in an old edition of Threads magazine.


1) Fold tube in half  (right sides together)- I use a 3" wide strip for a somewhat wide strap
2) Slip String into the fold STRING NEEDS TO HANG OUT ON EITHER END - SO CUT IT LONGER than the fashion fabric strip
3) Pin fold down
4-6) When sewing down long side of strap, make sure to catch the string at just one end of the tube. Sew several times back and forth so it can't pull through when you tug.
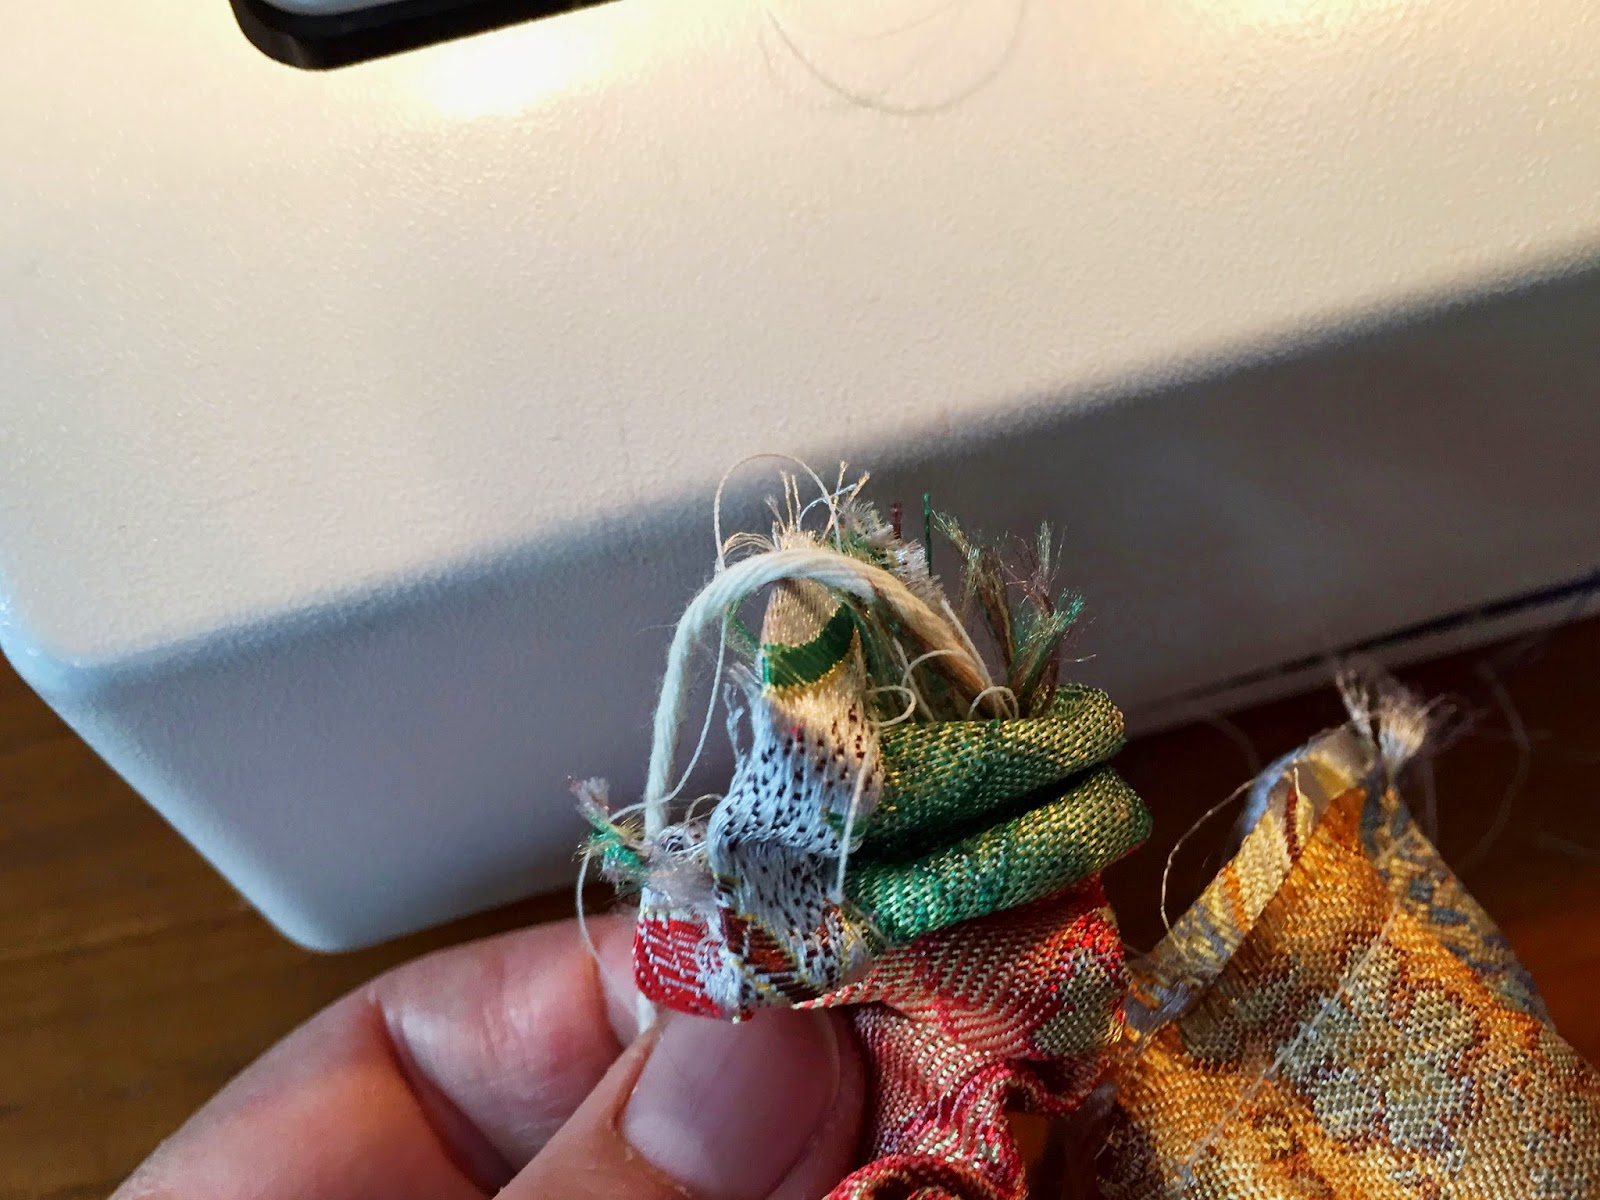
7 - 9) Work the fabric over the string, by pulling on the end of the string you did NOT sew down

10) Eventually you've turned the strap all the way inside out - the inside being the side you want to see

11 -12) cut off the end of the tube where you throughly sewed the string across

Then pull the other end of the string out, turn your seam so it runs up the middle in the back of the strap and press the strap flat.

Tuesday, December 30, 2014

Scraps: Scrunchies or Chou Chous? Green Sewing for the New Year

Two Completed Chou Chous
(along with a fabric covered book) I made for gifts
~ ~ ~ 
Web Resources 
Enchanted by Sewing Show Notes and Links to Shows http://www.enchantedbysewing.blogspot.com/2014/12/ench-by-sew-027-festive-holiday-tees.html

Audio-Only Link http://ec.libsyn.com/p/7/1/3/713e354889f7b167/FINALcastFestiveTeaAndTeesdec2014.mp3?d13a76d516d9dec20c3d276ce028ed5089ab1ce3dae902ea1d06c98e3ed7cf5d5260&c_id=8063812

What is a Chou-Chou or a Scrunchie? http://en.wikipedia.org/wiki/Scrunchie

Although I made chou-chous for holiday gifts, they are a perfect cleanup-for-the-New-Year or anytime, sewing cleanup/recycling project. You can't get more green than using up scraps of fabric that are too pretty to toss. You can also use the ends of stained or recycled clothing. You can even repurpose old worn elastic!


Here's the idea in picture form, to help you follow along with the Technicos segment of that show.


I can never toss really pretty scraps
But at some point, I need to use them!

I measure out 10 inches of 1/4 inch elastic

I fold a 20 (or slightly longer) tube of scrap fabric
This one isn't perfectly straight and it has one edge hemmed  as a result
of a long-ago project trim. No problem

I pieced on one extra scrap, to make the tube about the
right width
An extra seam at an odd place isn't a problem
when you are scrunching up the fabric anyway

 I cut a piece of string longer than the length of the tube

And lay it inside the tube, along the fold line

Stitch down one side of the tube and across just ONE open end
Make sure not to catch the string when you sew the long side
But DO catch it when you sew across the open end

At this point, I chose not to trim along the seam line,
to give a sausage-like look to the finished chou-chou

Push the sewn across end down into the tube


Pull the string end through the tube, so the outside pulls through
Note that this is a very thick, fabric like chou-chou
That's because I chose not to trim the seam after I sewed it,
to give that sausage-like appearance.
Remember, the chou-chou fabric tube should be about twice as long as the elastic,
so that the fabric scrunches up
You also want enough elastic to be able to double the band around the hair
Otherwise, it will slide off.

Open the sewn-across end, by snipping off the string
Now you have two open ends
Add a safety pin to your 10" of elastic
Pull the elastic through your tube
I set the zig-zab stitch on my machine
I caught up/secured my elastic end on both ends
with a zig-zag stitch.
Be careful not to lose the elastic ends  down either end of the tube, at this point!
Then I sewed the two secured ends together
When I doubled the finishing off seam back to get a neater finish
I broke my needle
So after that, I wrapped my second, neatening seam with a hand stitch
That takes less time than changing my machine needle!


Saturday, July 13, 2013

Jeans Technicos/Techniques - Flat-Felled Seams Fall Flat, when it comes to Sewing Denim

In my last post, Summer of Jeans Sewing, I described my plan for learning to sew and fit jeans. I began by working on my flat-felled seam techniques.

How hard could that be? I've sewn these seams in light weight cotton a few times.
Hummmm, guess who needs to keep working on her flat-felled denim sample sewing? 

I started out with a review of flat-felled seams, In which Russell Conte of Sewing Arts Center shows us how to complete a Flat Felled Seam to give your garments a fresh clean professional look.
Check it out at http://www.youtube.com/watch?v=klyJYE4OcM0''


Another Resource to study http://oliverands.com/blog/2011/01/flat-felled-seams.html


Frankly, I figured i'd spend longer listening to Russell's well-done youtube video than I would sewing my first sample.

Har de har har!

~ ~ ~

Entonces, I got out my bits and pieces and got the sewing going.


Whoops! You sew WRONG Sides together when sewing a flat-felled seam.
Time for a visit with Auntie Seamah Rippah.


That's right
Wrong Sides together, and ready to seam
Remember to use
Jeans Needles
Seam
Press to embed stitches on both sides of sewn seam
Butterfly open and press on both sides
Study worn-out Ready to Wear Jeans
Oh, I see I want the topstitching on the back edge
Actually - in my sample below - I did it the other way with the
topstiching on the front edge.
But that was the least of my challenges

I'm going to trim away here,
As close to the seam as I can get
But just on one side

Deciding that I wanted to have topstitching
on the right of the Front seam - opposite of the Ready to Wear pair above!-,
 I trimmed the front
Seam Allowance, so that the Back Seam Allowance
Would wrap around, over, and encase the front
which would mean I'd topstitch on the front Seam Allowance edge

Here, I folded the back seam allowance
over and around the front
Then glued it down so the seam wouldn't move
while I topstitched

How close to the seam allowance did the
Ready to Wear folks do their topstitching?
An eighth of an inch.
No - it didn't occur to me until I made my graph paper model (below)
that they probably didn't sew a 5/8 inch seam allowance like I did!

OK, that means I sew here

I'll position my left presser foot toe on top of the
seam, to keep my line of topstitching straight

Hope this orange topstiching thread is the right stuff
It's Gutterman, heavy weight topstitching, but it doesn't
specifically say it's for jeans....

Hummmm No matter what I did when I started (and re-started)
The fabric didn't move well when I began sewing
But, as you see on the scrap piece, it sews fine on a single layer
And I've sewn this same fabric into shorts, so I know it should sew up
Is it the glue?

Uh oh.... That eighth of an inch topstitching ddn't really catch the seam

I added a second line of topstitching to fell the rest of the seam
And golly, my topstitching wasn't straight, though I thought I was
watching the presser foot toe carefully on both stitching passes

Time to get out the graph paper and think this thing through!

Gee, it sure sounded easy before I actually tried it!


Wednesday, July 3, 2013

Technicos:Embellishing a Tee - Machine Embroidery and Stabalizer

Woven stabalizer below
Film stabalizer on top
Then the top part of the hoop nests in
The part that attaches to the machine is beneath the tee
As I've mentioned in a past Enchanted by Sewing podcast , my machine embroidery is not accomplished using the latest, snazziest machine model. I use a Husqvarna Iris, which I purchased as one of the lowest end embroidery models about nine years ago. I bought my machine in August, as I'd been told this was traditionally a time when sewing machines are discounted. True? Maybe! Well, I'd always wanted a machine with this kind of capability and the somewhere around one thousand dollar price tag on this machine was possible because I'd made a little extra money the previous year. Husqvarna may consider this a budget-oriented machine, but for us it was a big ticket item.

My machine uses cards - no digital downloads. Those cards are no longer available for purchase from the manufacturer (a nine year-old machine is practically an antique these days). I found that out when I finally decided to break down and buy an additional card (I had one that came with the machine, and one that I had purchased for $150 when I bought the machine.) Luckily I found a few cards on EBAY for $50. I bought three. Would even more designs be fun? Would I like to be able to download digital designs or maybe learn to digitize my own? You bet! 

But am I satisfied with what I have for the time being? Yes. I don't spend my life, or even most of my sewing time, embellishing. So I am satisfied with what I have, and enjoy doing a little machine embroidery. I've also found that I enjoy repetitively stitching out certain designs like this dragonfly.  I can turn it different directions and make a bigger or smaller version.

I've also learned how to do machine embroidery on my tee shirt projects without getting the knit fabric stuck and gummed up under the needle (though I seam to recall it makes a pretty neat noise when this happens!).  

Here's what I do....

1) I hoop the back of the project with traditional stabalizer. Sorry I don't known what kind that is. It's the regular somewhat stiff, heavy kind I use for a woven cotton or linen. 
2) I put my hoop bottom piece below that sheet of for-wovens stabilizer, 
3) then I add my tee shirt. 
4) On top of the tee - and before I fit the top of the hoop in- I lay a piece of film-type stabilizer. 
5) The smaller hoop piece (it nestles inside the back/bigger hoop part that fits onto the machine) goes on top of that. Then I screw it in place and away I stitch. No more stuck needles and gummed up projects.


I hope this will help me and others
Locate this film stabalizer that tops off my tee shirt/knits
machine embroidery projects
I found my stabalizers at a Sewing Expo, at a booth that specialized in only that kind of product. I've noticed that sometimes it's hard to locate stabilizers in fabric stores, and when I do the clerks, even those who are also sewists, may not know about these products. So I plan to start taking better notes about what I've purchased the next time I get a chance to talk to a knowledgable vendor. If you know of links that explain what to choose and when, please post them or email them to me EnchantedBySewing  AT gmail.com.

Taking a tee-shirt beyond the basics with embellishment like machine embroidery, is one of many things that keeps me....
Enchanted by Sewing!

Saturday, March 9, 2013

En Curso/ In Progress: The Placket Faced Monster ( Shirt B5526)

This  YouTube Video by "Fashion Sewing Blog TV" , does a very nice job of showing how to sew a sleeve placket.
I'm glad I had my original muslin to test with
That way, I won't be wasting the remnants of my
jungle print fashion fabric

 I wasn't expecting to need to alter anything about the cuff, since I'm not aware that we changed anything about the bottom of the sleeve, but it seemed to me that the placket strip, was too short for the placket opening. I followed along with the great placket video linked above, so I think I know what I'm doing. As a result of testing this, I'll be adding a little length to my placket strip before I cut one for the jungle print test garment.


Tuesday, December 25, 2012

A New Nightgown for the Winter Holidays

Kaity Rose seems happy with her newly sewn nightie
You may enjoy the technical illustrated how-to's in my previous posting about tucks.

When practicing tucks sewing for a future nightgown of my own, I sewed a new nightgown for a favorite little friend, Kaity Rose. (KRose will share her new nightie with her comrade, Holly the Dolly.)

I used this *free pattern download* of the nightgown for the American Girl Samantha  doll for this charmer.

I talked about this project, created a descriptive audio tutorial about making tucks and shared a number of ideas for avoiding tucks sewing pinfalls in the December Enchanted by Sewing Podcast. The show is freely available in the iTunes store for download to a mobile device, or you can listen on the web without downloading by clicking on this link.


Friday, September 28, 2012

When Zippers Fly - September Sewing Basket

My September Sewing Basket is Singing Out To Me
Haloooooo, we're still full over here!


I'm still working away on completing the items in my September sewing basket.

Finally getting on with those sage-y green shorts. Yes, we can still hope to wear shorts here in the San Francisco Bay Area for another month or more. What is it about getting those fly front zipper techniques down? I'm going to review Trudy's fly-front zipper tutorial on youtube. Thanks again to Hot Patterns.

Why do they call it a "fly" on the front of the zipper?

From past experience, I don't think this zip will be flying off my machine that all quickly.

Buena suerte para mí!