Journaling - Learning to fit and work with my sloper.
I'm also learning to question, my sloper.
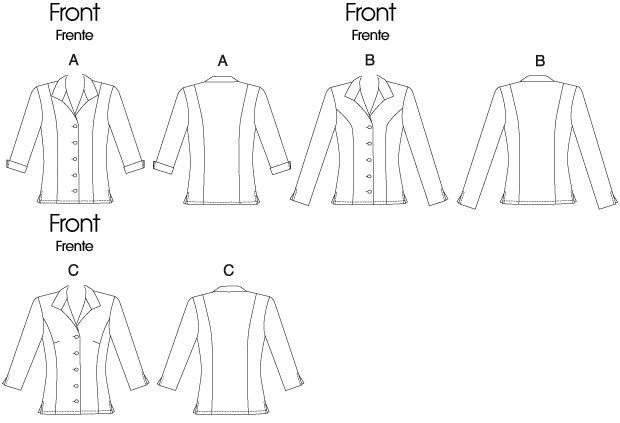
I'm starting with a basic princess-seamed shirt pattern - McCalls 6076.
Initially I'm working with the princess-seam in shoulder seam option (view A). (others in line drawing below)
Noted so far
- Learning to compare front or back pattern pieces to my sloper, I have to learn where to place them. Do I line up the base of underarm seam/armscye? If I start comparing at shoulder seam I can get thrown off because I often need to alter this area - except on some commercial patterns, when it's fine!
First time through with a test-garment (that's the one I'll actually wear, one step beyond my muslin) I'm making a sleeveless version. I'm taking careful note of where I
-a- I alter the underarm seam (armscye) to create a tighter fitting armhole
-b- Take the top of the armhole back somewhat, for this no-sleeve version.
Later I'll test the muslin with a muslin sleeve, where I'll test the pattern without both of these (a and b) alterations.
Another benefit to a sleeveless test garment is, I'm getting it out of a piece that is somewhat less than 2 yards. I will be piecing the under collar, and also the front facing. But I don't expect those piecing line to show.
Waistline and Princess Seam Alterations
Working on a very fitted look without overfitting
Would be better to add an extra seam allowance - 1 inch instead of 5/8- for all this playing around
Lots of trying on here! Did same front and back on all 4 princess seams
I made sure to safety pin the front closed matching up the button hole marks, so that I don't overfit. I want the shirt to button and need a certain amount of overlap for that.
- First I basted a 1/4 inch seam along the princess stitching line
- Then increased (still with a basting stitch) the princess line seam allowance to 7/8"
- Then I unabasted the second line of basting below the bust and graded back to the 7/8"
- Finally I took in/graded the waist with a kind of elongated half oval, about 3 and 1/2 inch above and below the waist. Challenging figuring out when to alter waist and when to alter princess seams - lots of safety pin basting helped with that
Altering Armscye/Armhole for Sleeveless Version
I took the shoulder seam back towards the neck for an improved sleeveless style
* Compared to my sloper, and graded in 1/2 inch at bottom of armhole/armscye on side seam for sleeveless. Then I graded back out to original side seam after, hummm.... about one to two inches? A french curve is handy for doing that. I admit, I eyeballed it. I kept the original full seam on the pattern, because I'll probably want it for the sleeved version. I also kept it on the muslin so I can reuse the muslin when testing a sleeved version.
* I also tested raising the side seam up for the sleeveless version (based on what I learned in French Pattern Drafting class going from moulage to sloper) , but it was too tight.

* For sleeveless, I'm raising outside shoulder (taking it back towards the neck line) for sleeveless style - 1 3/8" (11/8") without S.A. - so probably either 9/8 (1 and18) or 6/8 (3/4) " cut back/off - the first for 1/4" and second 5/8" S.A. I'll mark on the pattern what works for sleeveless - but keep the full original armscye on pattern for sleeved version test.
In addition to desirability of a sleeveless shirt for our late-running summer-in-fall weather, this helps me to focus on fitting aspects of the torso. The sleeve adds in a whole 'nother fit challenge, even though it means I have to make alterations when I go between sleeveless and sleeved. A good reason to journal!
Shoulder Seams
* I ended up adding 1/2" (better would have been more - because I only took a 1/4 "seam allowance (S.A.) - so next time add in 7/8") to the back
* I therefore took back 1/2" from the front because of alteration to back. Again because I only sewed the 1/4" S.A., next time through I will add back another 3/8 inch and sew a full 5/8" S.A.
* I've made this shoulder line adjustment many times, the reason I didn't catch it when comping my Master Pattern Trace (M.P.T.) to the sloper? For the back - I forgot that the S.A. is not included in the sloper pattern, as it is in the commercial pattern. (Often forget this). For the front, I don't know. The front of my sloper just looks too high. The No S.A. sloper comes out at the same time as the M.P.T.. So it seems like maybe I should make a tentative adjustment to my sloper front - dropping it by perhaps.... 3/8 or 1/2 inch. It's challenging thinking between with and without S.A. But this is something to think about math 'wise as I continue to work comparing my sloper to patterns I trace.
- I pin basted the muslin to make sure I had a basic fit, but I really didn't see the shoulder issues until I cut out and stitch -basted the test garment. In the future, maybe encourage myself to stitch-baste that muslin. I have a way of not seeing the pattern as real until I move past the muslin. It seems good enough, and I really want to see it as an actual garment. And with the pins in, I'm always in a hurry to get out of it!
I basted with a stitch length of 6 and starting out with 1/4" seams. Then I keep trying it on and increasing the S.A. up to 5/8" . Alternatively, I could have added a full 1" S. A. on the first pass, but I figured since the muslin was OK, I didn't need to.
Right now I'm happy with accurately placed shoulder seams - which gives a shirt a custom fitted look. I took in the 2 side seams more, but they are still a little loose. However, I haven't yet basted a deeper princess seam (4 actual seams). Once I check those, I'll know if I want to grade in - all or some of - the side seams to increase the fitted look.
 |
| M6076 - Three princess-seamed shirts |
I'm starting with a basic princess-seamed shirt pattern - McCalls 6076.
Initially I'm working with the princess-seam in shoulder seam option (view A). (others in line drawing below)
Noted so far
- Learning to compare front or back pattern pieces to my sloper, I have to learn where to place them. Do I line up the base of underarm seam/armscye? If I start comparing at shoulder seam I can get thrown off because I often need to alter this area - except on some commercial patterns, when it's fine!
-a- I alter the underarm seam (armscye) to create a tighter fitting armhole
-b- Take the top of the armhole back somewhat, for this no-sleeve version.
Later I'll test the muslin with a muslin sleeve, where I'll test the pattern without both of these (a and b) alterations.
Another benefit to a sleeveless test garment is, I'm getting it out of a piece that is somewhat less than 2 yards. I will be piecing the under collar, and also the front facing. But I don't expect those piecing line to show.
Waistline and Princess Seam Alterations
Working on a very fitted look without overfitting
Would be better to add an extra seam allowance - 1 inch instead of 5/8- for all this playing around
Lots of trying on here! Did same front and back on all 4 princess seams
I made sure to safety pin the front closed matching up the button hole marks, so that I don't overfit. I want the shirt to button and need a certain amount of overlap for that.
- Then increased (still with a basting stitch) the princess line seam allowance to 7/8"
- Then I unabasted the second line of basting below the bust and graded back to the 7/8"
- Finally I took in/graded the waist with a kind of elongated half oval, about 3 and 1/2 inch above and below the waist. Challenging figuring out when to alter waist and when to alter princess seams - lots of safety pin basting helped with that
Altering Armscye/Armhole for Sleeveless Version
I took the shoulder seam back towards the neck for an improved sleeveless style
* Compared to my sloper, and graded in 1/2 inch at bottom of armhole/armscye on side seam for sleeveless. Then I graded back out to original side seam after, hummm.... about one to two inches? A french curve is handy for doing that. I admit, I eyeballed it. I kept the original full seam on the pattern, because I'll probably want it for the sleeved version. I also kept it on the muslin so I can reuse the muslin when testing a sleeved version.
* I also tested raising the side seam up for the sleeveless version (based on what I learned in French Pattern Drafting class going from moulage to sloper) , but it was too tight.
* For sleeveless, I'm raising outside shoulder (taking it back towards the neck line) for sleeveless style - 1 3/8" (11/8") without S.A. - so probably either 9/8 (1 and18) or 6/8 (3/4) " cut back/off - the first for 1/4" and second 5/8" S.A. I'll mark on the pattern what works for sleeveless - but keep the full original armscye on pattern for sleeved version test.
In addition to desirability of a sleeveless shirt for our late-running summer-in-fall weather, this helps me to focus on fitting aspects of the torso. The sleeve adds in a whole 'nother fit challenge, even though it means I have to make alterations when I go between sleeveless and sleeved. A good reason to journal!
 |
| M6076 - Test Garment Fit In Progress |
Shoulder Seams
* I ended up adding 1/2" (better would have been more - because I only took a 1/4 "seam allowance (S.A.) - so next time add in 7/8") to the back
* I therefore took back 1/2" from the front because of alteration to back. Again because I only sewed the 1/4" S.A., next time through I will add back another 3/8 inch and sew a full 5/8" S.A.
* I've made this shoulder line adjustment many times, the reason I didn't catch it when comping my Master Pattern Trace (M.P.T.) to the sloper? For the back - I forgot that the S.A. is not included in the sloper pattern, as it is in the commercial pattern. (Often forget this). For the front, I don't know. The front of my sloper just looks too high. The No S.A. sloper comes out at the same time as the M.P.T.. So it seems like maybe I should make a tentative adjustment to my sloper front - dropping it by perhaps.... 3/8 or 1/2 inch. It's challenging thinking between with and without S.A. But this is something to think about math 'wise as I continue to work comparing my sloper to patterns I trace.
- I pin basted the muslin to make sure I had a basic fit, but I really didn't see the shoulder issues until I cut out and stitch -basted the test garment. In the future, maybe encourage myself to stitch-baste that muslin. I have a way of not seeing the pattern as real until I move past the muslin. It seems good enough, and I really want to see it as an actual garment. And with the pins in, I'm always in a hurry to get out of it!
I basted with a stitch length of 6 and starting out with 1/4" seams. Then I keep trying it on and increasing the S.A. up to 5/8" . Alternatively, I could have added a full 1" S. A. on the first pass, but I figured since the muslin was OK, I didn't need to.
Right now I'm happy with accurately placed shoulder seams - which gives a shirt a custom fitted look. I took in the 2 side seams more, but they are still a little loose. However, I haven't yet basted a deeper princess seam (4 actual seams). Once I check those, I'll know if I want to grade in - all or some of - the side seams to increase the fitted look.
~ ~ ~ Web Resources ~~~
An interesting related fitting post, that journals some of the challenges of fitting a basic princess-seamed pattern http://artisanssquare.com/sg/index.php?topic=16322.0


